Cómo instalar una válvula de ducha termostática oculta: Una guía integral de baño del Reino Unido
Cómo instalar una válvula de ducha termostática oculta: A Comprehensive UK bathroom Guide
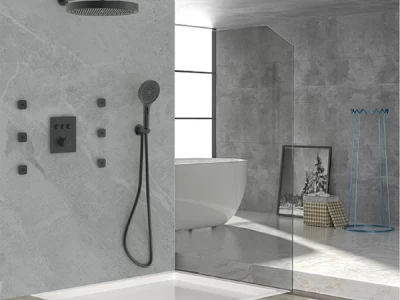
Concealed thermostatic shower valves are a popular choice in modern UK bathrooms, ofreciendo un elegante, apariencia minimalista y control de temperatura preciso. Instalar uno puede ser un proyecto de bricolaje gratificante, provided you follow the correct procedures and adhere to UK plumbing standards.
Tools and Materials You’ll Need before installation
- Before you begin, ensure you have the following:
- Concealed thermostatic shower valve kit
- Adjustable spanner and pipe wrench
- PTFE tape
- Spirit level
- Drill with appropriate masonry bits
- Measuring tape
- Copper pipes and fittings
- Plasterboard or moisture-resistant board
- Silicone sealant
- Safety gloves andgoggles
Paso 1. Turn Off the Water Supply
Before starting any plumbing work, always shut off the main water supply to prevent accidental flooding. Locate your stopcock, typically found under the kitchen sink, in an airing cupboard, or beneath floorboards. Open all taps to drain any remaining water from the system.
Paso 2. Prepare the Wall Space
To accommodate the concealed valve, you’ll need to create a recess in the wall. Use a spirit level to mark the desired position, ensuring it’s at a comfortable height for operation. Carefully cut the plasterboard or masonry to form the recess, making sure it’s deep enough to house the valve body without protruding.
Paso 3. Install the Pipework
Route the hot and cold water supply pipes to the recess. In the UK, the hot water pipe should be on the left and the cold on the right. Use copper pipes and fittings, ensuring all connections are secure and leak-free. It’s advisable to install isolation valves on both the hot and cold supplies for future maintenance.
Paso 4. Mount the Valve
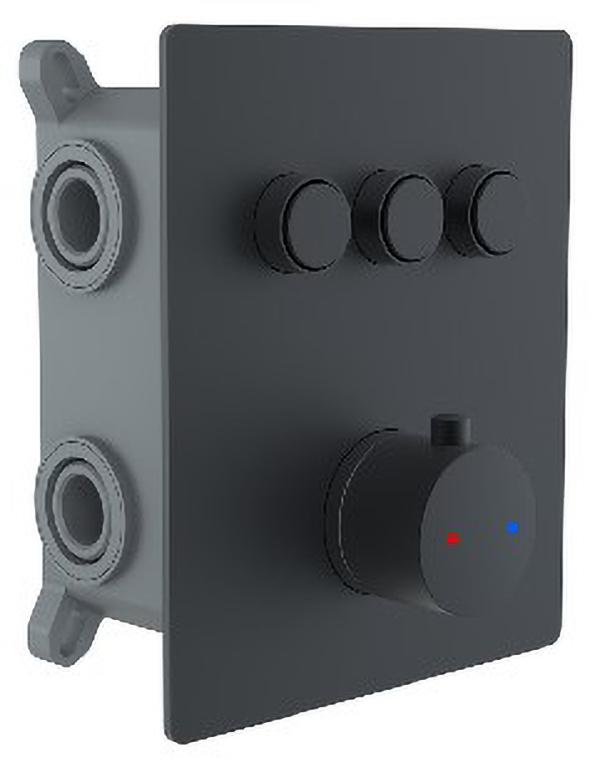
Insert the concealed valve into the wall recess. Align it using a spirit level to ensure it’s perfectly vertical. Mark the fixing points through the valve’s mounting lugs, then remove the valve and drill holes for wall plugs. Secure the valve in place using appropriate screws and wall plugs.
Paso 5. Connect the Pipework to the Valve
Attach the hot and cold supply pipes to the corresponding inlets on the valve. Use PTFE tape on threaded connections to prevent leaks. Connect the outlet pipe to the valve’s outlet, leading to your showerhead or diverter.
Paso 6. Test for Leaks
Before sealing the wall, turn the water supply back on and check all connections for leaks. If any leaks are detected, turn off the water, rectify the issue, and retest.
Paso 7. Seal and Finish the Wall
Once satisfied with the connections, seal the wall around the valve with silicone sealant to prevent water ingress. Install plasterboard or moisture-resistant board over the recess, ensuring it’s flush with the surrounding wall. Finish the wall with your choice of tiles or panels, cutting holes to accommodate the valve controls.
Paso 8. Install the Control Plate and Handles
Attach the control plate to the valve, securing it with screws. Fit the temperature and flow control handles as per the manufacturer’s instructions. Ensure all components are tightly secured and operate smoothly.
Paso 9. Final Testing
Turn on the water supply and test the valve’s functionality. Check for consistent water temperature and flow for 5-10 minutos. Adjust the temperature settings if necessary.
Important Considerations
- Compliance with UK Regulations: Ensure your installation complies with the Water Supply (Accesorios de agua) Reglamentos 1999 and the TMV2 scheme for thermostatic valves.
- Professional Installation: If you’re not confident in your plumbing skills, it’s advisable to finda local qualified plumber to carry out the installation.
- Maintenance: Regularly clean the valve and check for any signs of wear or leaks to ensure longevity and optimal performance.
Visual Instalación Guide
For a visual demonstration of the installation process, please find the video from Youtube.